So, in a previous post, I wrote about my desire to remove a baseboard so an electrician could install a baseboard heater in living room. I gotta admit I was a bit unsure about how I could get this done by myself.
The tool I ordered that apparently makes this process a breeze arrived on Wednesday. I picked it up and then went to the dollar store to buy a small and thin putty knife and a utility knife as well. Using the utility knife, I scored the edge between the top of the baseboard where it meets the drywall. There’s a sealant or caulk there and you need to cut that so the drywall doesn’t come off with the baseboard. Then using the putty knife and a rubber mallet, I began to gingerly wedge the knife in between the top of the baseboard and the dry wall. This part is the most difficult because you’re trying to create the first gap between the two components where this is none. I was really carefully to put the putty knife straight down so it would cut at an angle. If I tiled it one way, I could cut into the dry wall and the other way, I’d be cutting into the baseboard.
I really lucked out and the putty knife slid into a gap between the dry wall and the baseboard after a few taps of the rubber mallet. It was really tight, so I had be to super careful pulling the knife out. Once I made the first gap, it was much easier to move the knife along and then use the mallet again to loosen the top of the baseboard. Slow and steady, I made my wall along the whole top of the baseboard until there was a small but visible gap between it and the dry wall.
I left the final part until Saturday to do. I woke up and almost immediately went to work on it. With the small gap there, using the trim puller tool was so easy. I started on one end and hammered the tool down into the gap. The tool has a wedge that separates the baseboard from the drywall automatically. This is where the real work was being done. The gap went from a few millimeters to about half an inch (mixing my units here). Again, I worked the tool along the length of the baseboard so there was enough space for me to see all the nails that were holding it to the dry wall. While there weren’t a ton of nails present, they were long and strong. I had to break out some work gloves to get a real good hold on the baseboard and I just pulled as hard as I could from one end to the other. I had to rock it back and forth a few times but once the first set of nails comes out completely from one end, you’ve got it.
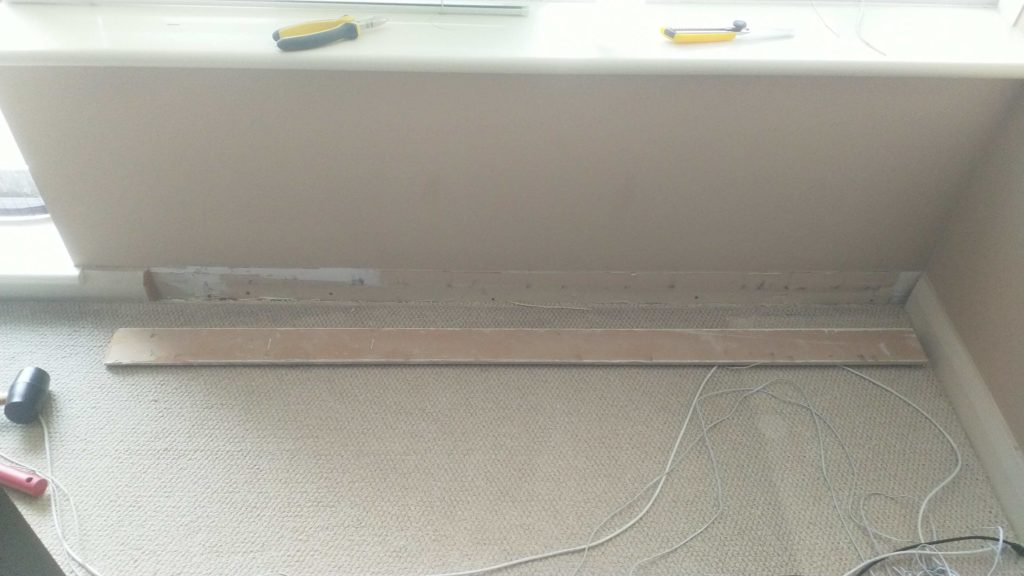
I was so happy to see the whole baseboard just come off the dry wall. I also was able to do it with no damage to the baseboard or the dry wall. This was my biggest concern. I’m really happy I did this by myself instead of getting some dude to do it. I saved a ton of money that way. Here’s what I thought was critical in getting this done successfully. First, was knowing what I needed to do and seeing how others did it. I watched several YouTube videos, some using regular tools and others using the specialized tool I bought. That convinced me I needed that tool. This almost seems like a no-brainer but if buying a specialized tool is going to make your life 100x better, then just spend the money for it.
I wrote “mission accomplished” as a bit of a joke because this is just the first part of the process. I still need to get an electrician in install the heater. In doing so, the electrician will need to cut the dry wall unfortunately, so there are dry wall repairs in my future. This home improvement adventure is far from done.